Milling

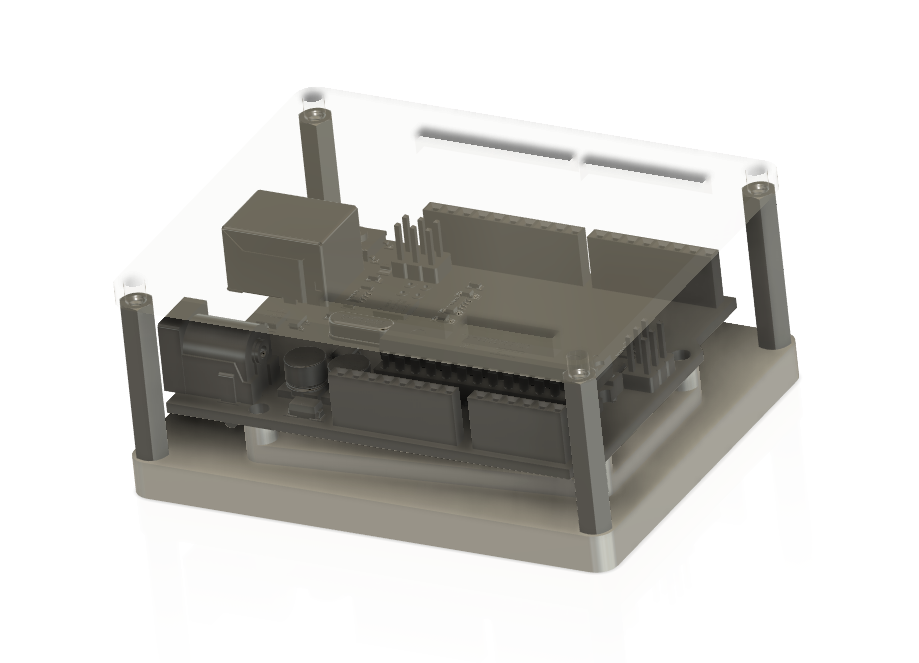
Today I started milling a part that will become a student project. The idea is to have each student learn how to mill their own Arduino holder. The holder allows for easy prototyping, and will give them hands on knowledge of how to use CAD and CAM to to setup a part.

The CAD aspect of the project utilizes a spec sheet in order to get mounting hole dimensions for the Arduino. Students will learn how to import a canvas into Fusion 360 and calibrate the canvas to the correct size. Next, students can build their holder directly on the canvas. Additionally, the CAD project requires importing components from McMaster Carr, and then using the CAM features of Fusion 360 to create the tool paths on two sides of the part. Lastly, the holder requires a laser cut top. Here is an image of the project below.


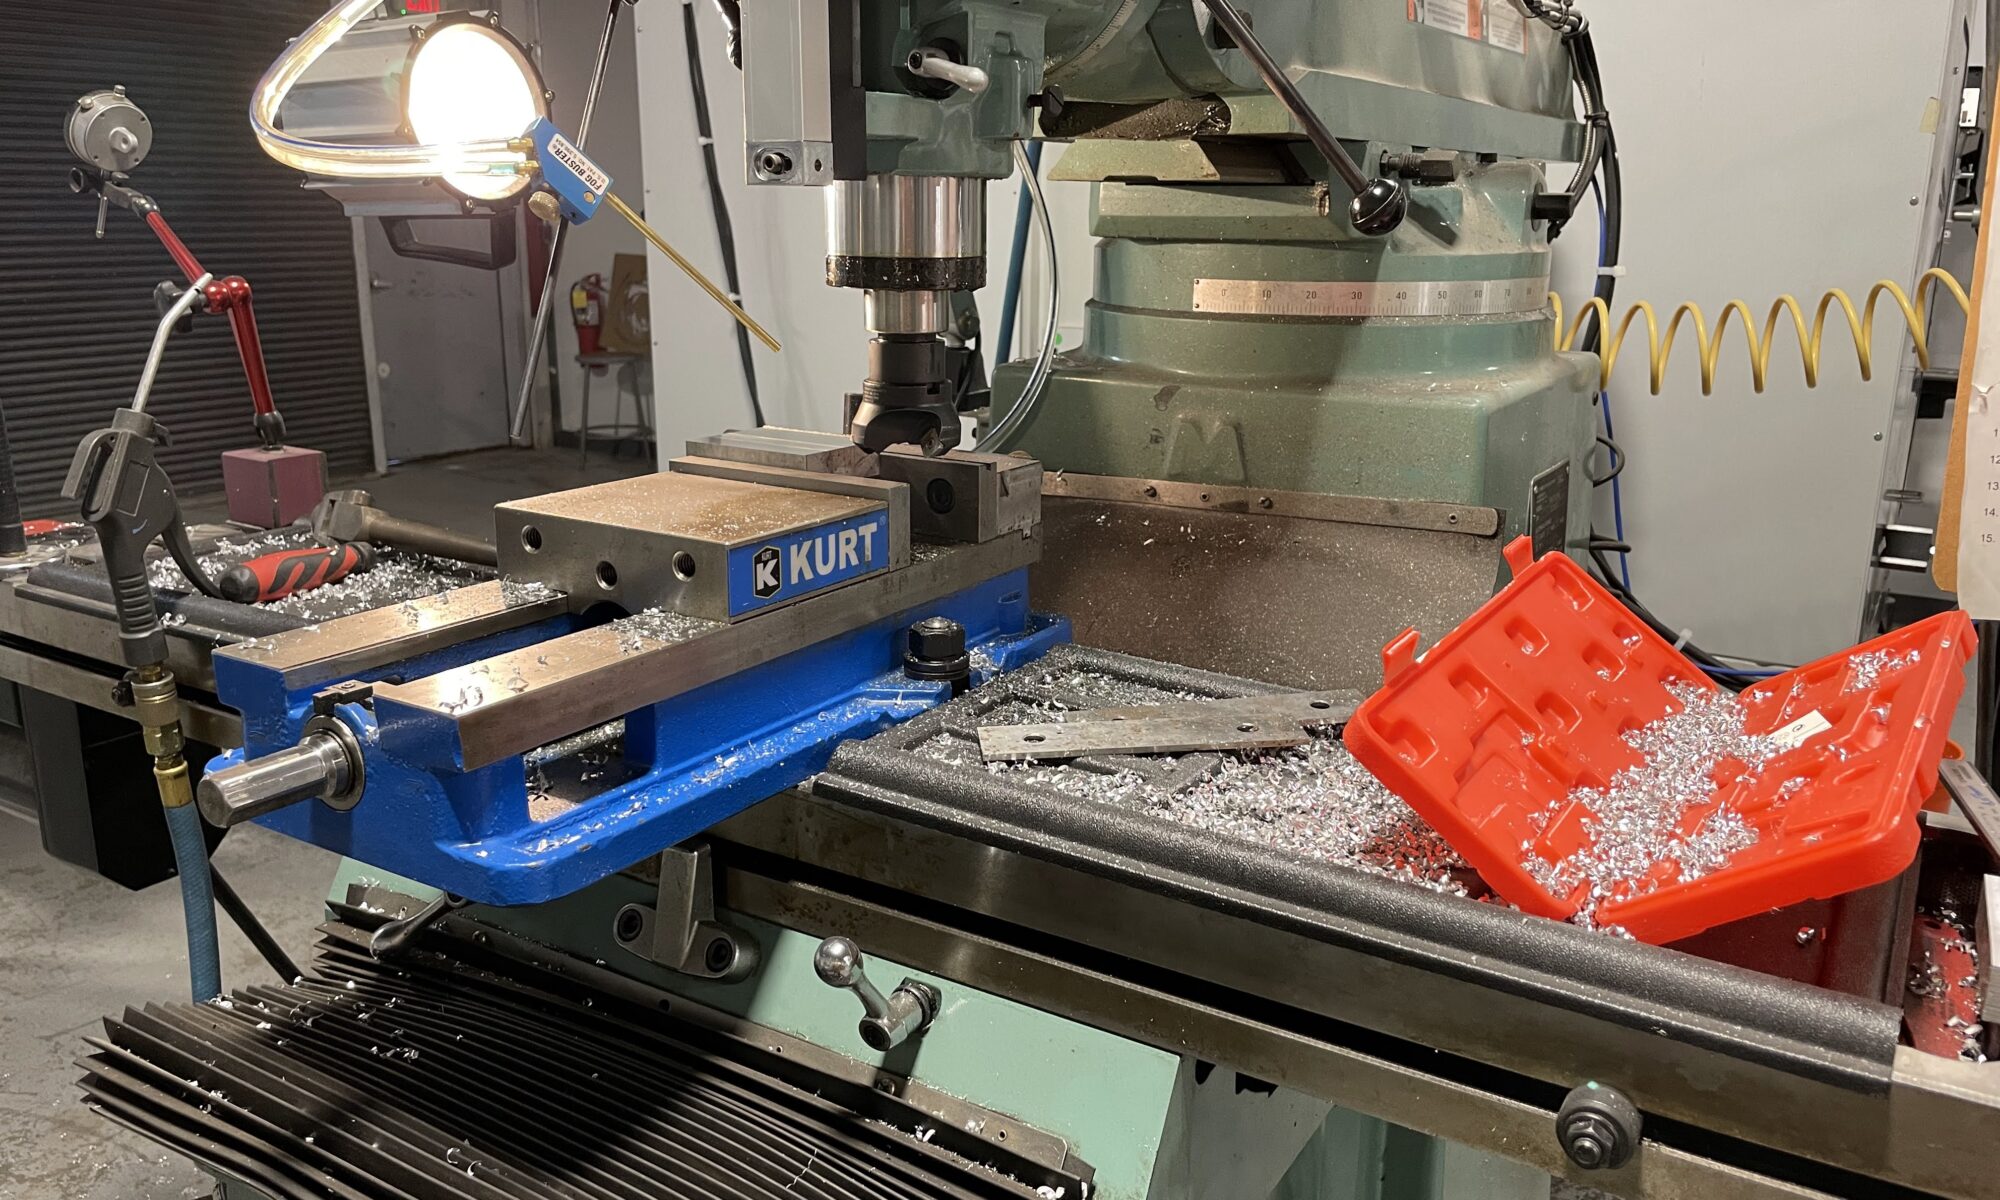
I was able to setup the CAM today and began cutting stock to size. This process started with making 3 cuts on our vertical bandsaw to a large piece of aluminum stock and then placing the stock on our Trax mill to get more precise with the stock dimensions. I am looking for a stock size of 3.2 x 2.6 x 0.8 inches.  Below are some images of cutting the stock.

Internet Radio

A while ago my wife surprised me with an old fashioned radio. It’s an Emerson 805 Series B model which was available in the 1950s. The radio does not work anymore, although all its guts were still intact, tubes and all. I decided to turn the radio into a working internet radio, and hoping to keep functionality of the tuning dial and power switch. 

So far, all I’ve managed to do is take the radio apart. A lot of interesting components inside, but for my purposes I will only keep the plastic enclosure and tuning and power knobs. The back needs to be recreated, which I will do with the laser cutter, as well as inner speaker lining. Not sure what I will use for that, but it can be attached to a lasercut support structure. 

For the electronics, I will initially be following a guide from Instructables – this one I found from _Marcel_ which looks very close to what I’d like to accomplish. In addition to new electronics, I’m also going to clean and repaint the enclosure and knobs, unsure of the color scheme right now, but I will want to keep a retro look to the radio. All for now, a few photos of the radio below.

Toothbrush Update

A few days ago I wrote about how my wife’s Philips Sonicare electric toothbrush failed. The brush still turned on, so the battery was not an issue. After taking it apart I was able to discover it was a mechanical fault, a metal piece had sheared off making it so the head would no longer vibrate. 

I was able to locate a new piece on Ebay to replace the broken hardware and it was an easy install to replace the part. The toothbrush is now functioning properly again, and a $10 part has saved us $100+ dollars on replacing the electric toothbrush. 

A few pics of the replacement part and the broken part below. In the first picture on the right you can see the old part with the sheared off piece. The middle image shows the sheared off part with a metal attachment. A screw (not shown) goes through the attachment piece and through a part connected to the brush mechanism, and then screws into the captive nut on the sheared off part (you can see the bottom of the captive nut sticking out of this piece. The photo on the left shows the not tip assembly purchased from Ebay. You simply need to unscrew and then attach to the vibrating mechanism on the toothbrush. 

We may not be able to fix everything, but we should endeavor to fix what we can rather than throwing something away.