LED Light Box

For our sophomores we have a few standard projects they all work on individually. These include the LED Light Box and SumoBot projects. For each project students are expected to complete their projects using their own CAD designs, as well as making their own PCBs and designing the circuitry from scratch.

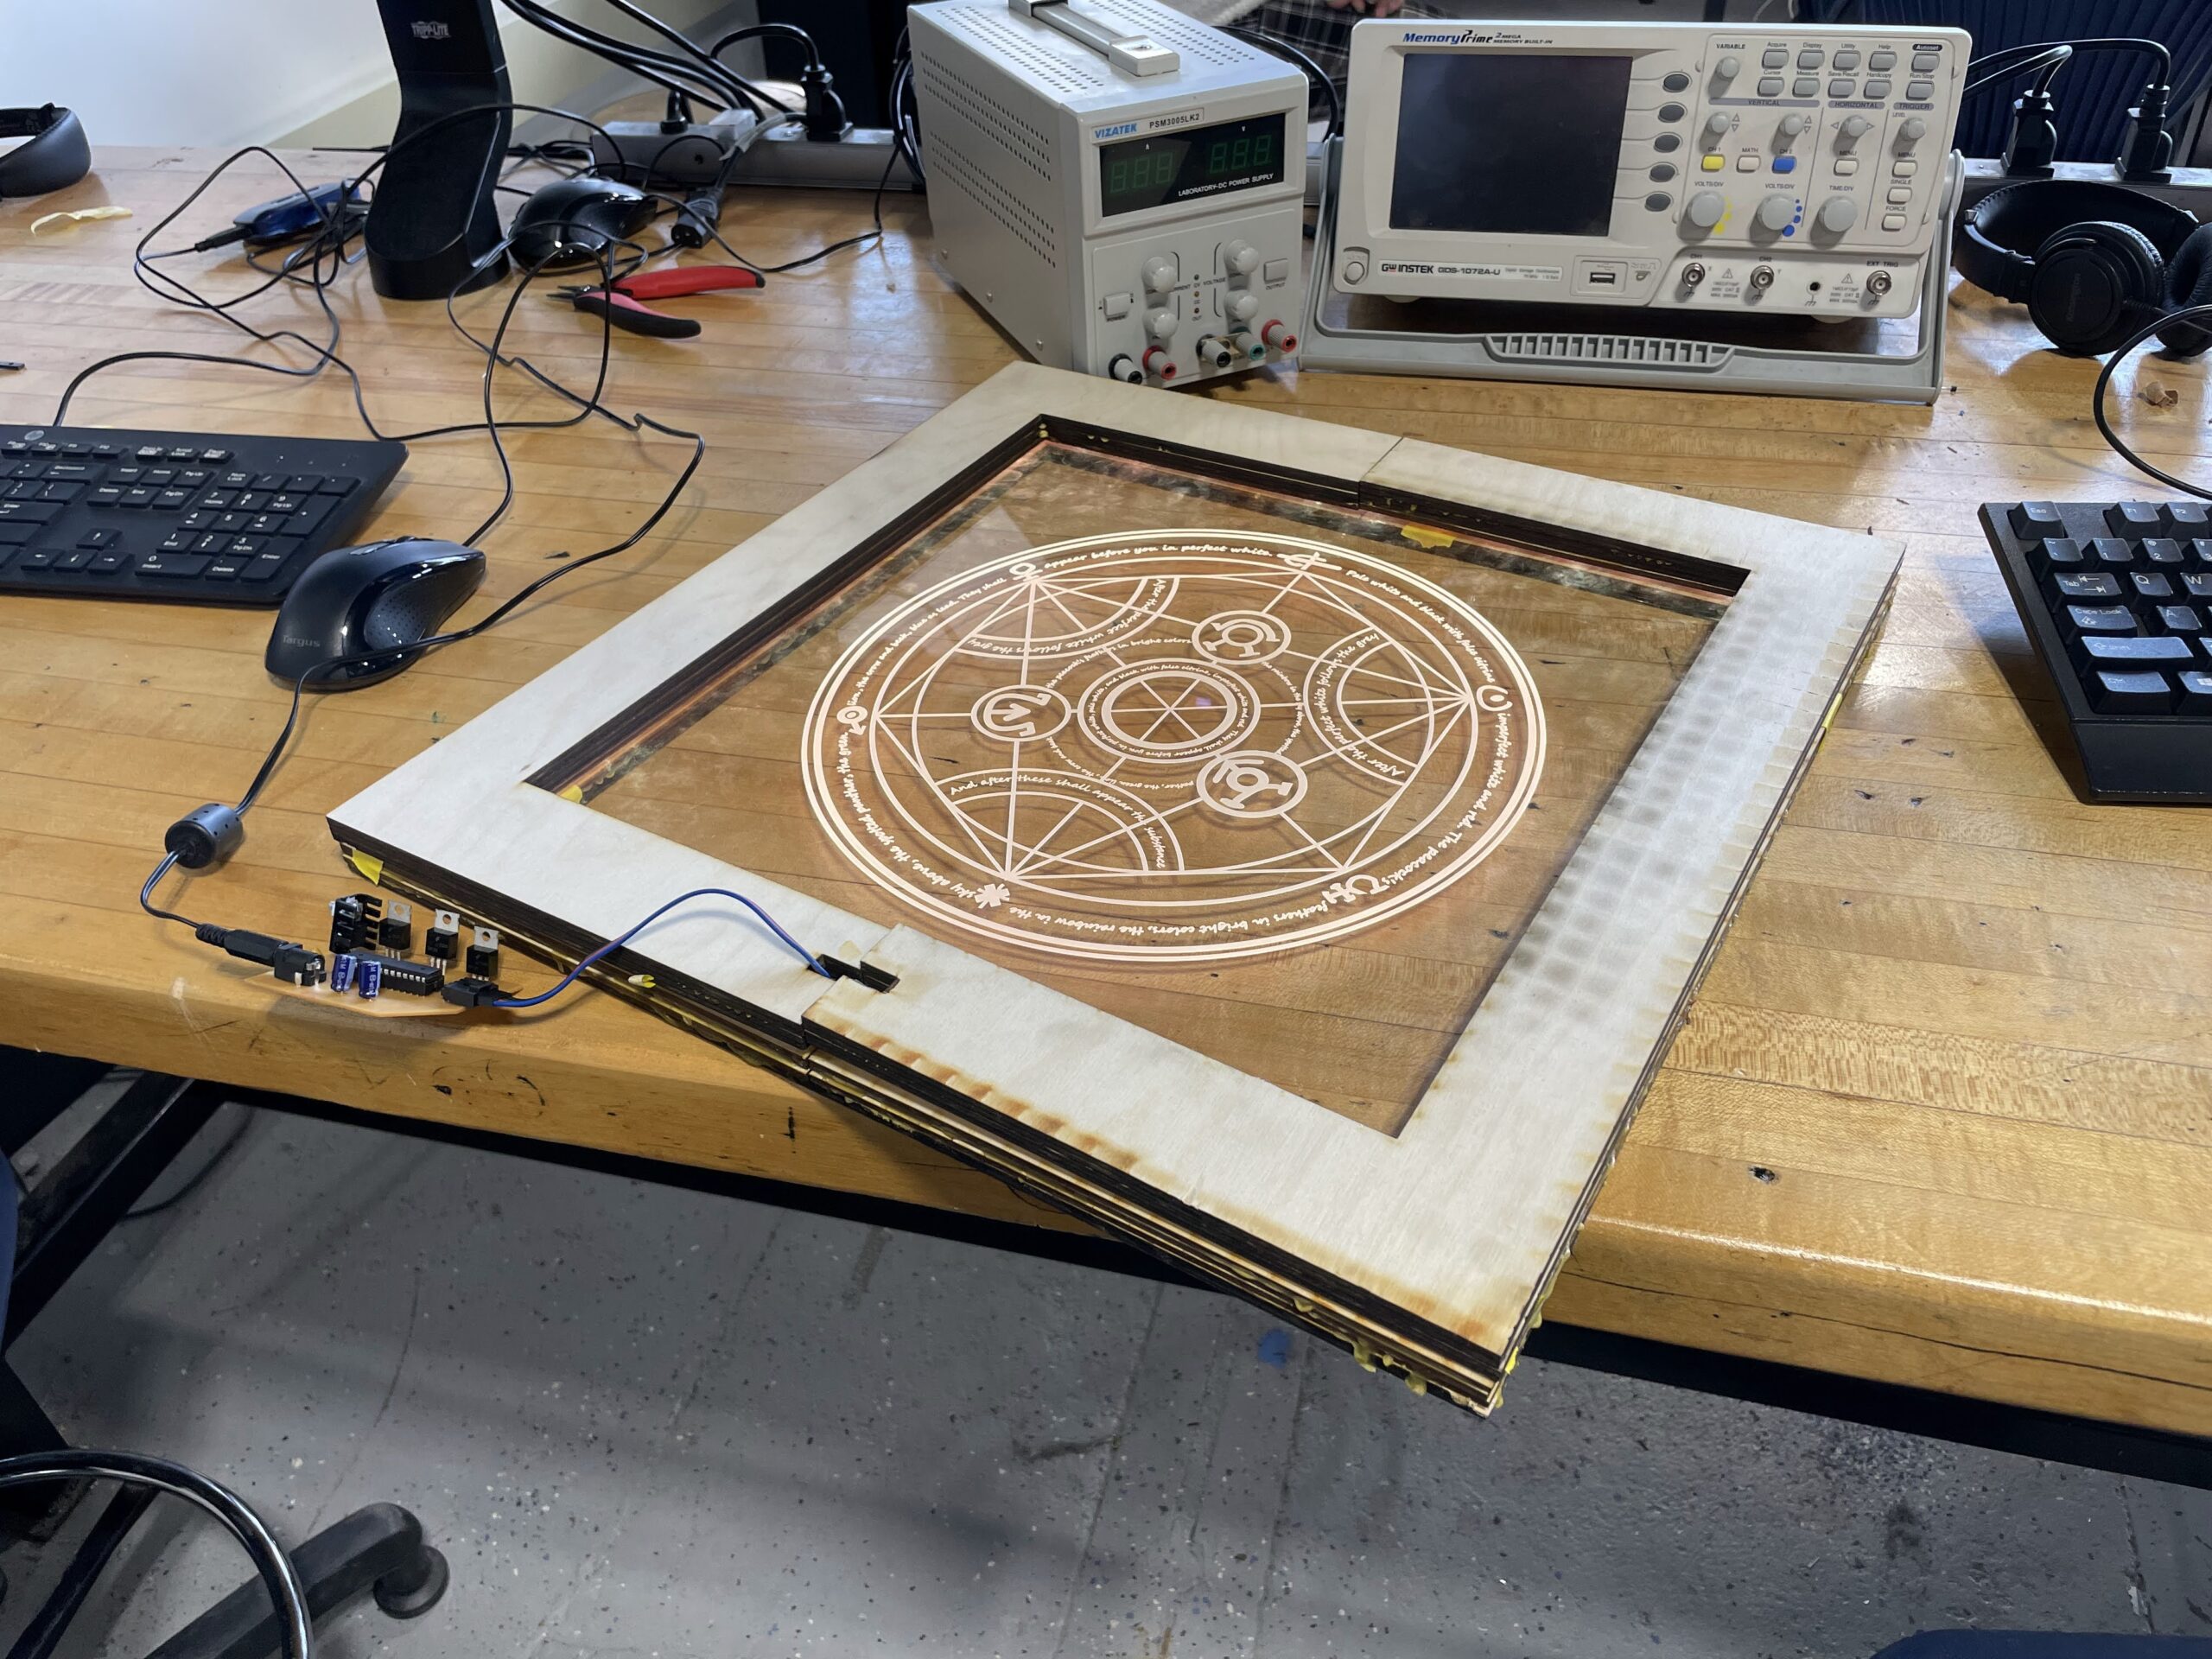
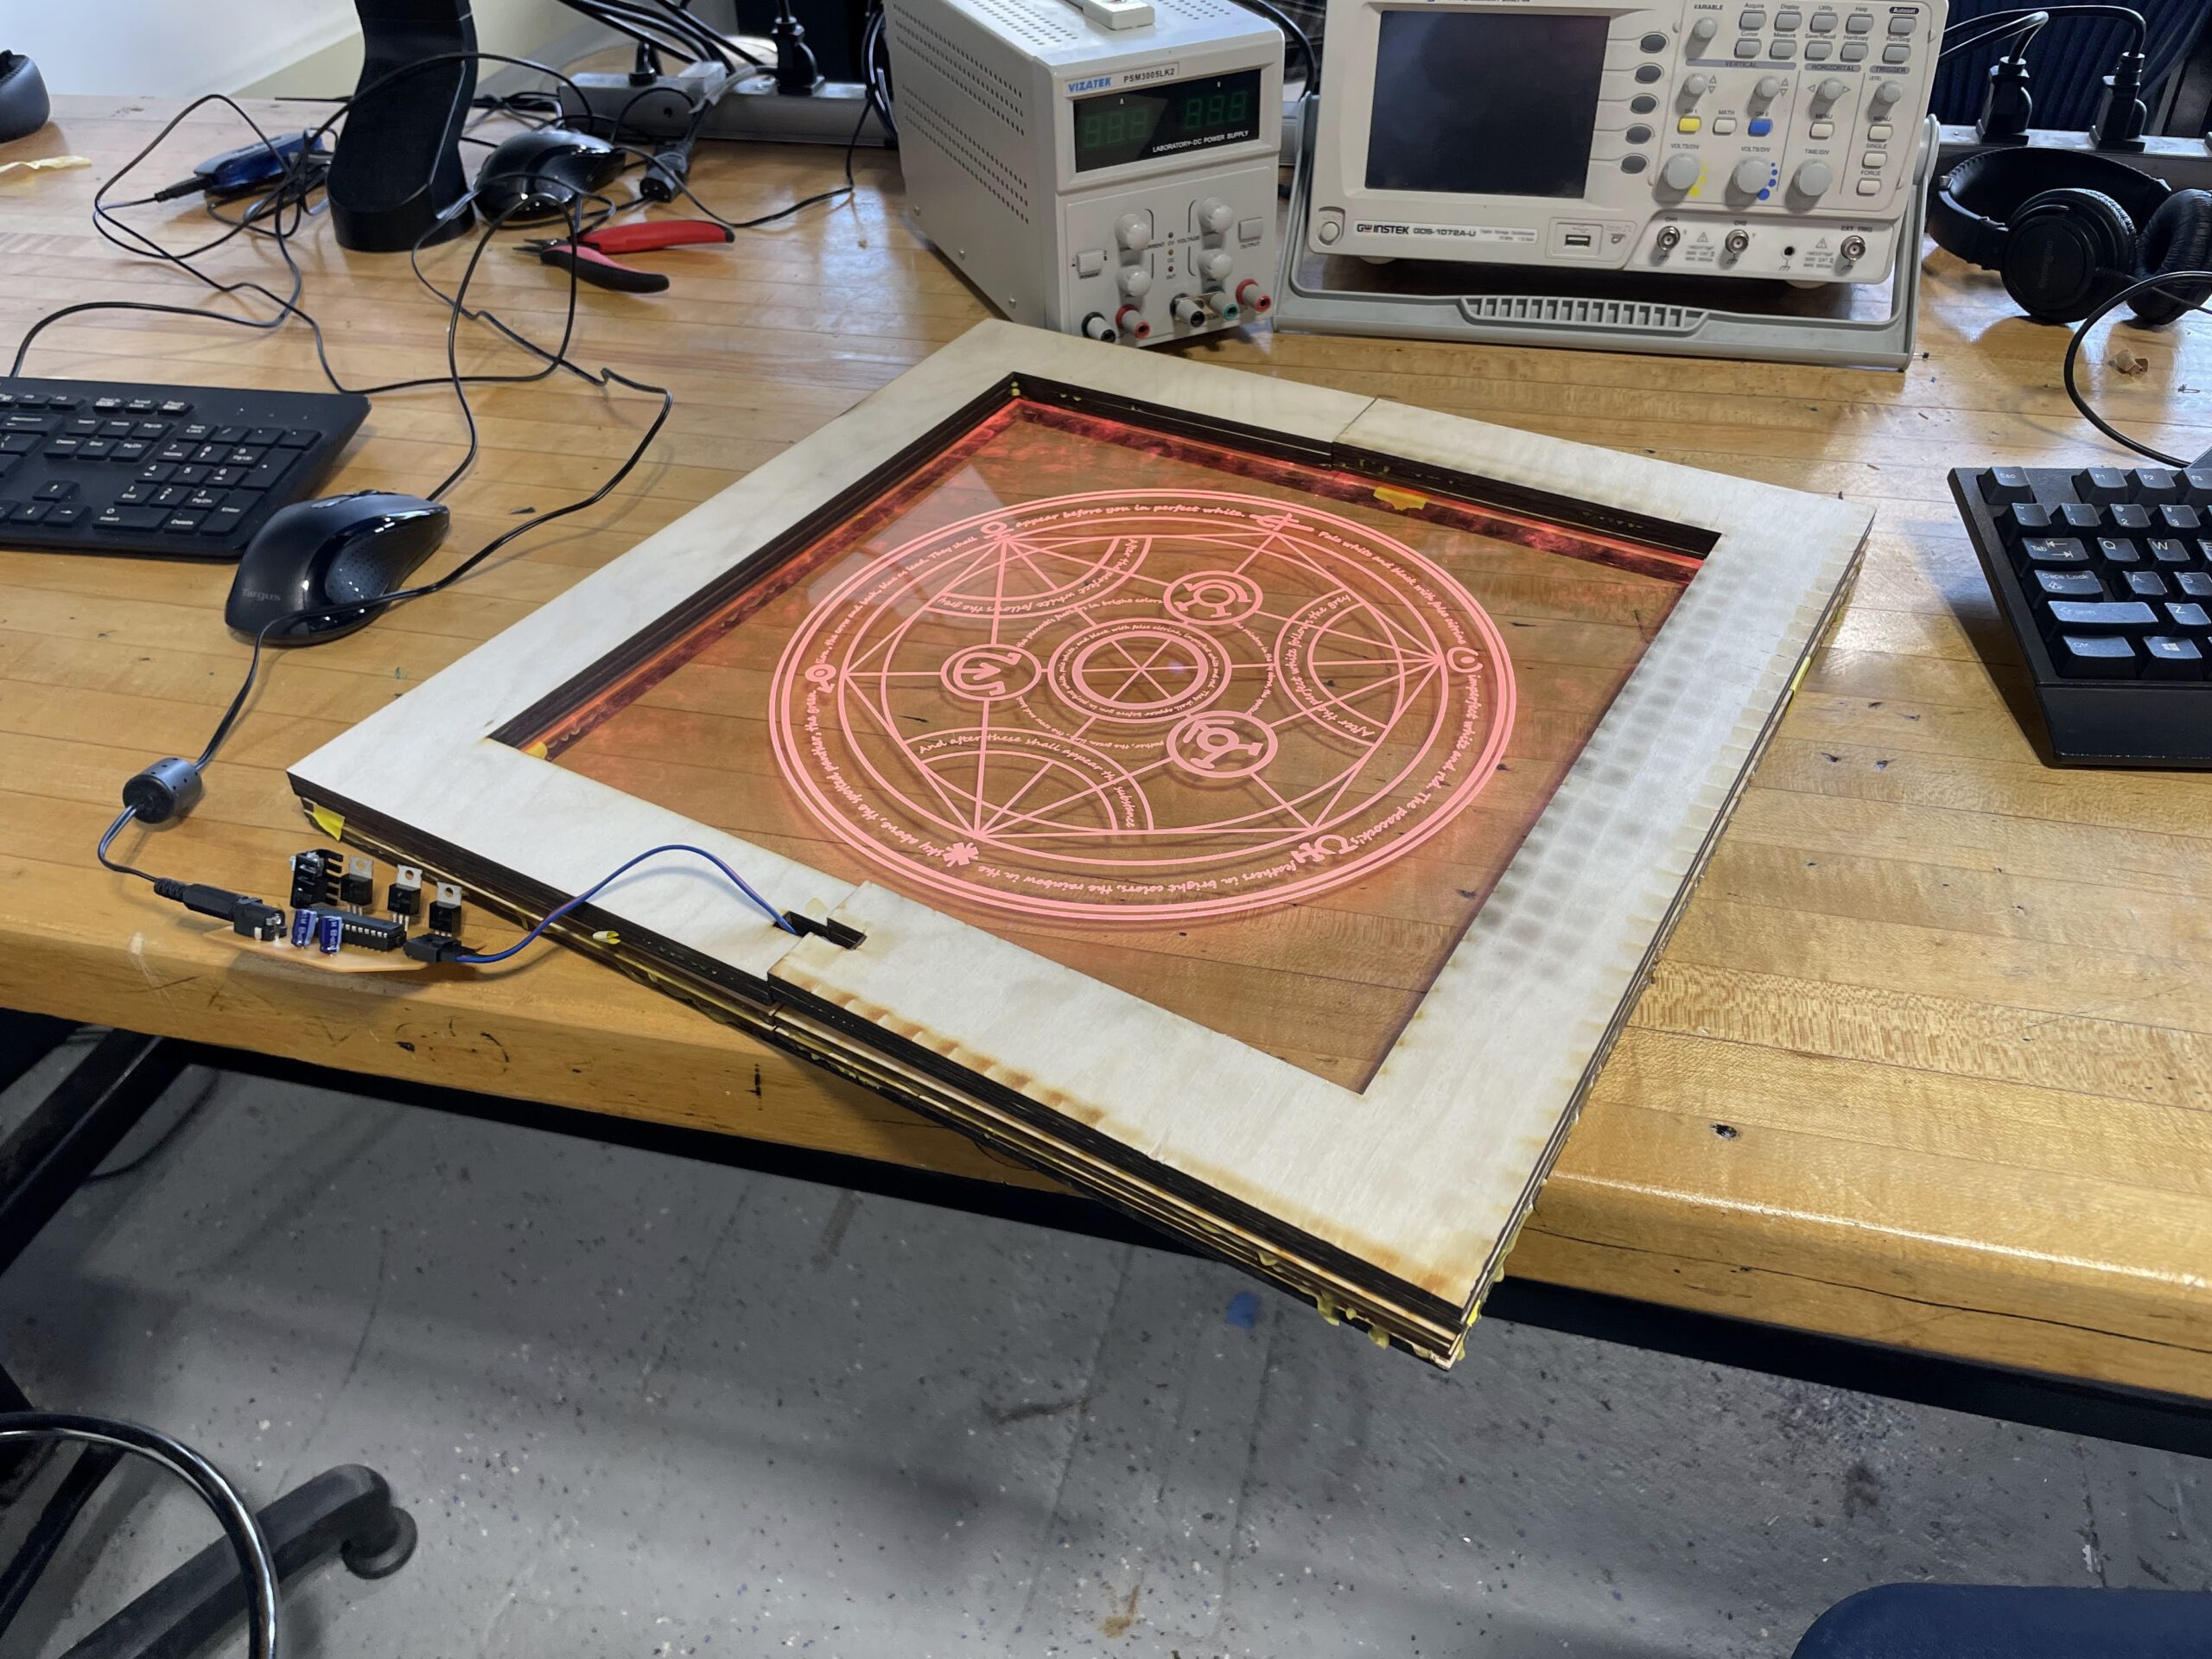
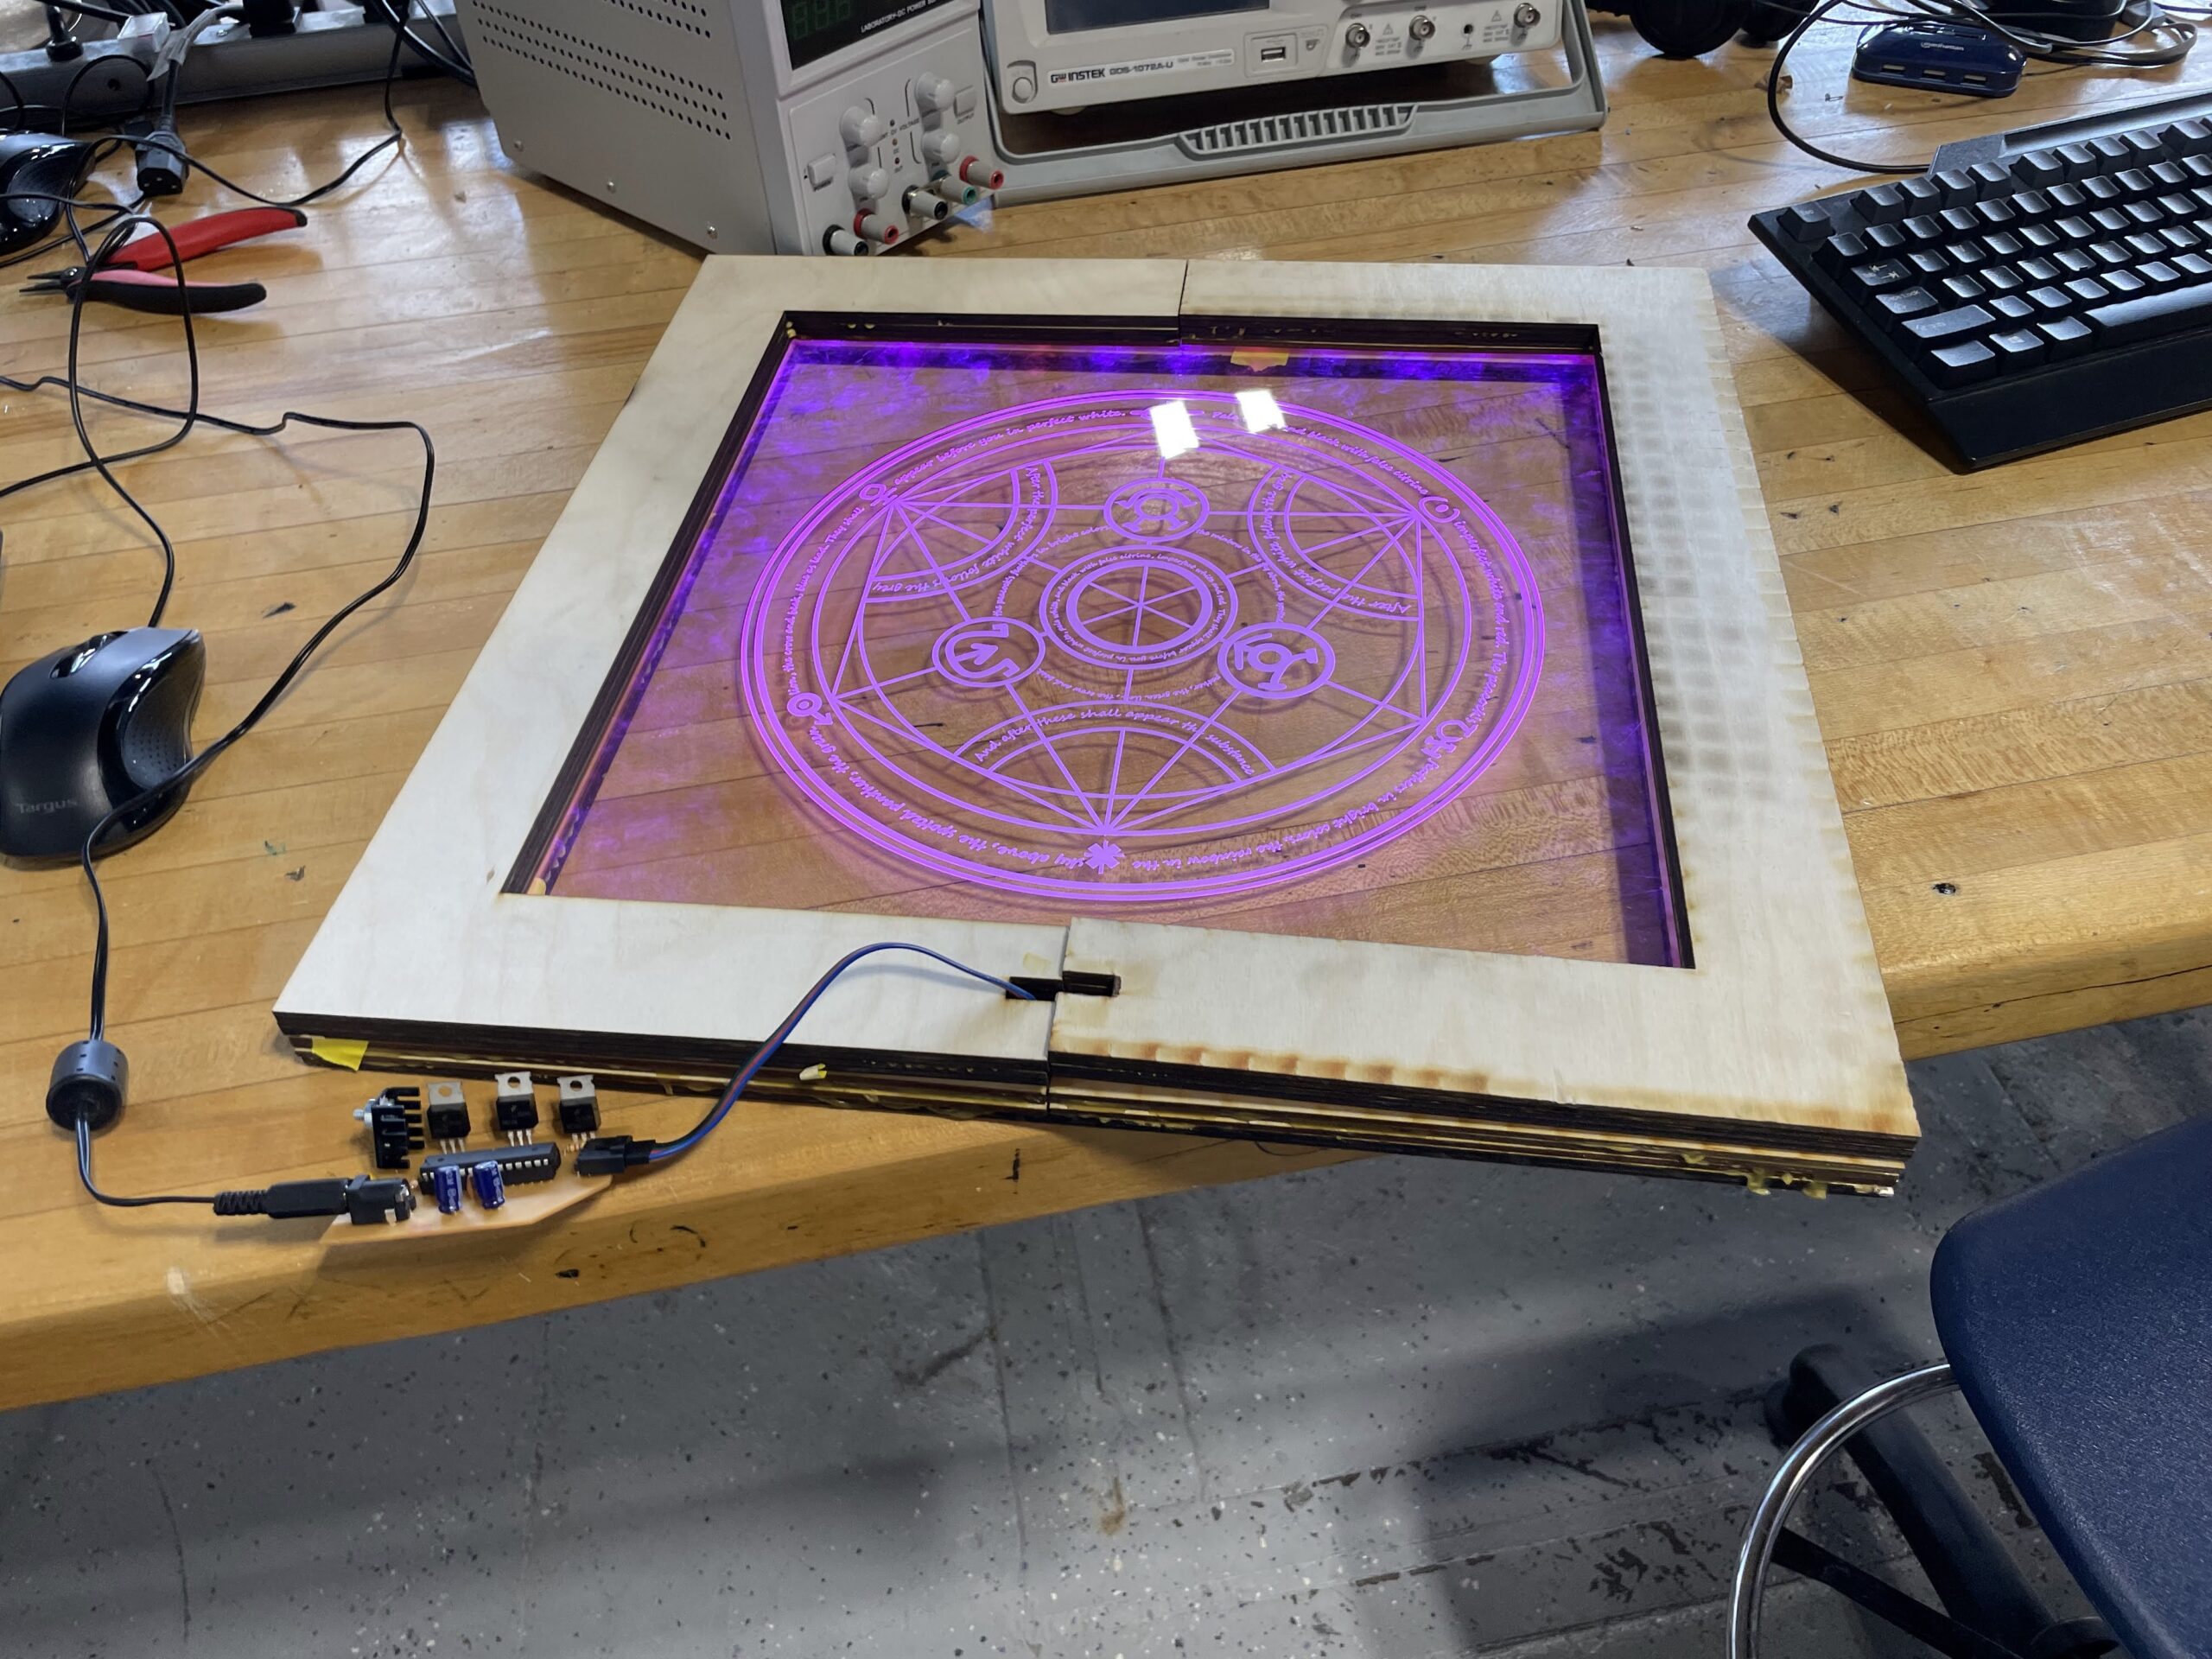
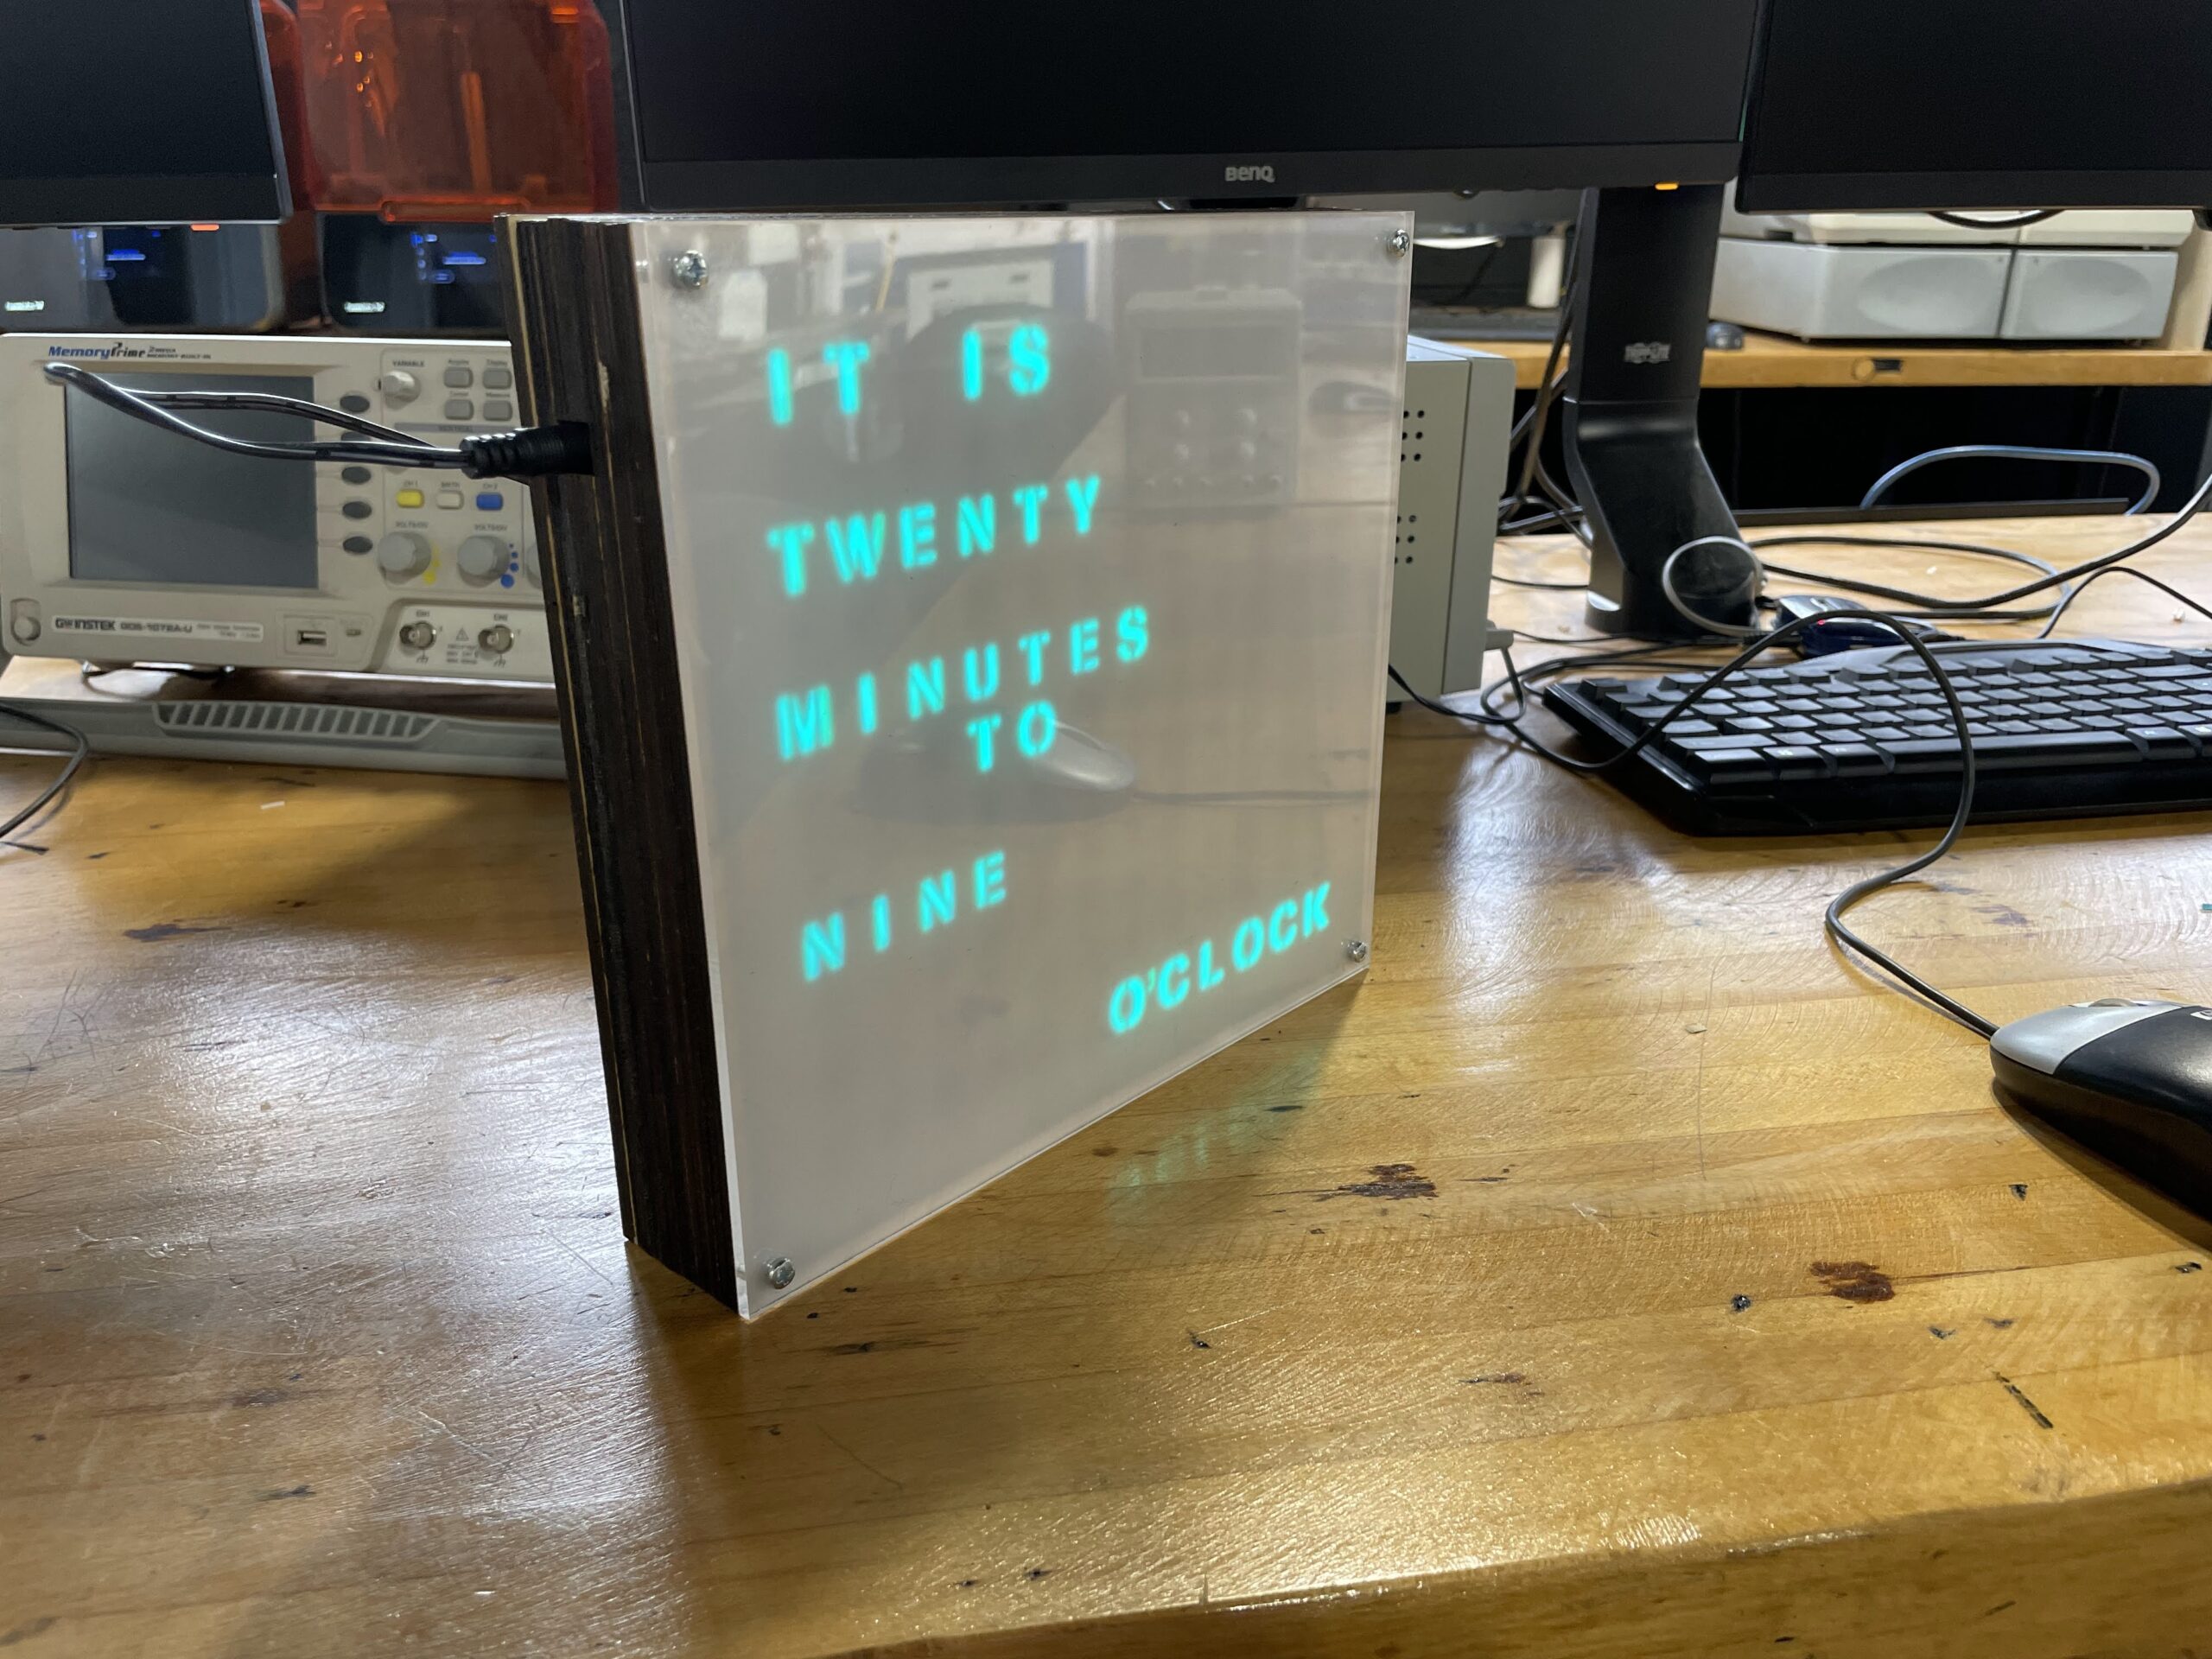
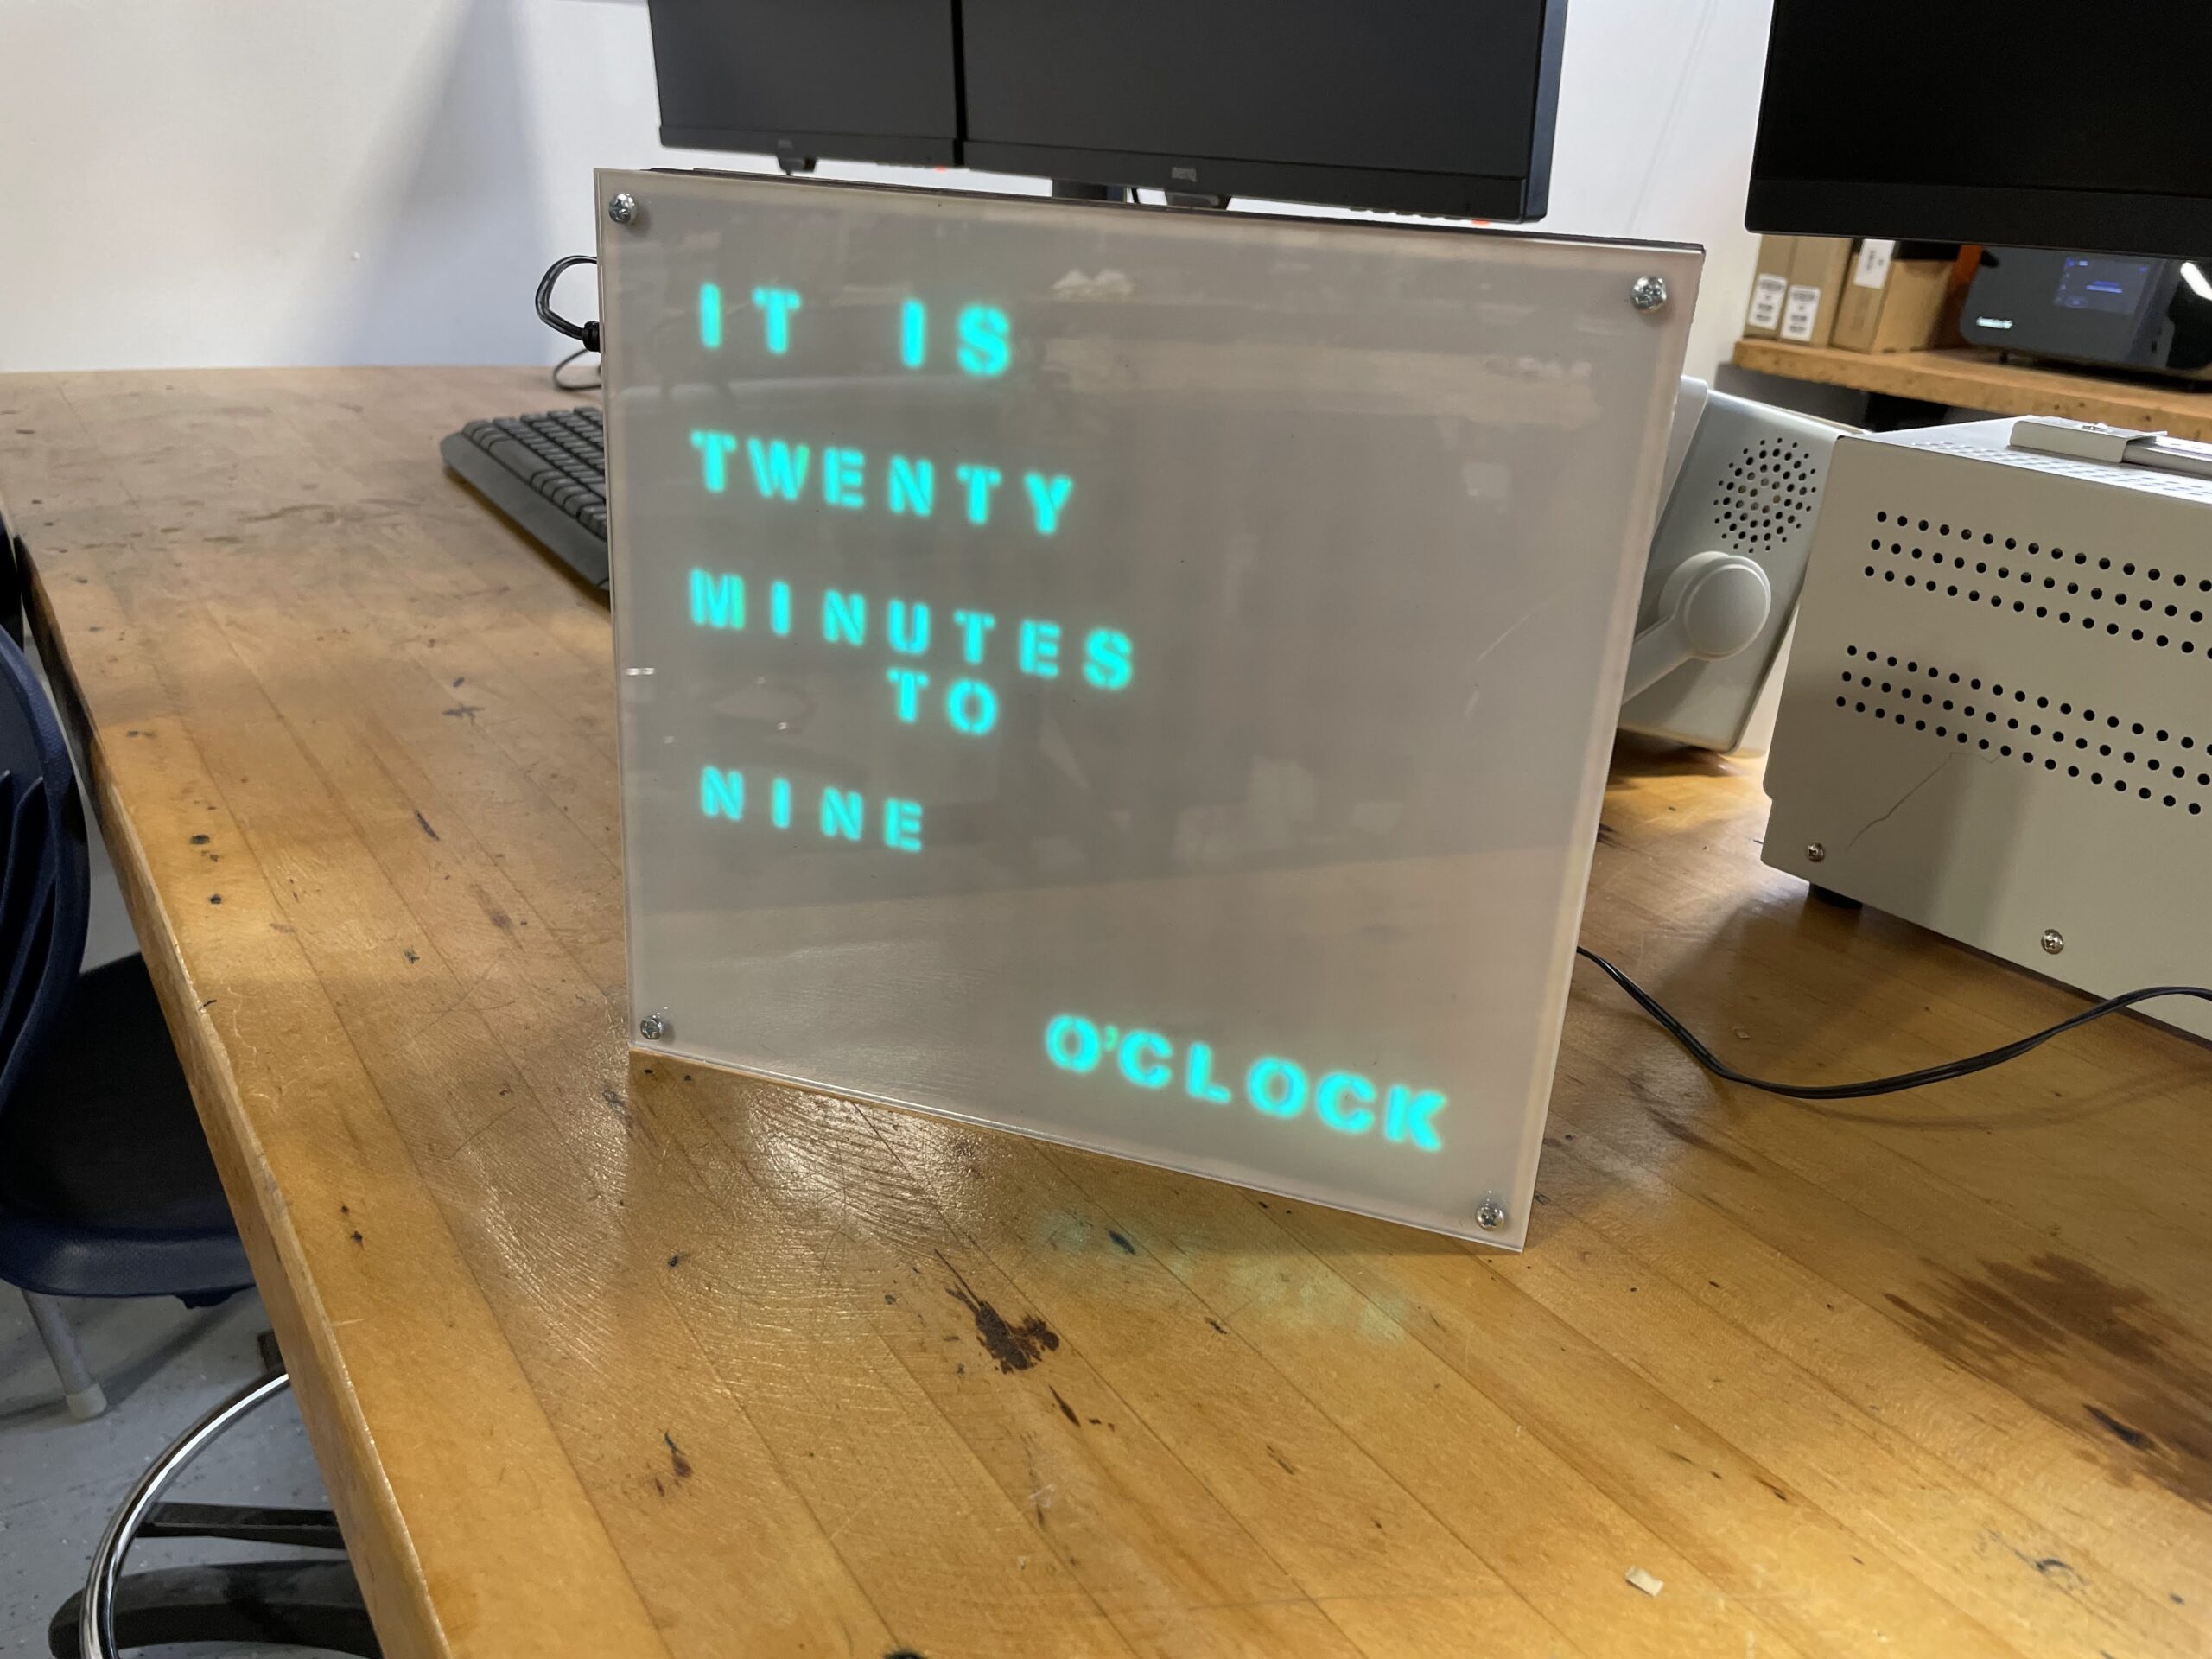
Unfortunately, for our current seniors, due to the COVID pandemic, they were unable to work on either of those projects, as they spent nearly a year and half learning remotely. Luckily, they are back in the building this year, and working hard to catch up on some hands on activities they missed. One student is now close to completing his LED Light Box, and it’s beginning to look very professional. I’m not sure what the inspiration for the acrylic is, but it came out really well. We use a raster technique for student designs on the back side of the acrylic and mirror the design so it looks backwards on the surface it is being laser etched into. When you turn the acrylic over, the design is in the correct orientation, and looks very clean behind a few millimeters of acrylic.

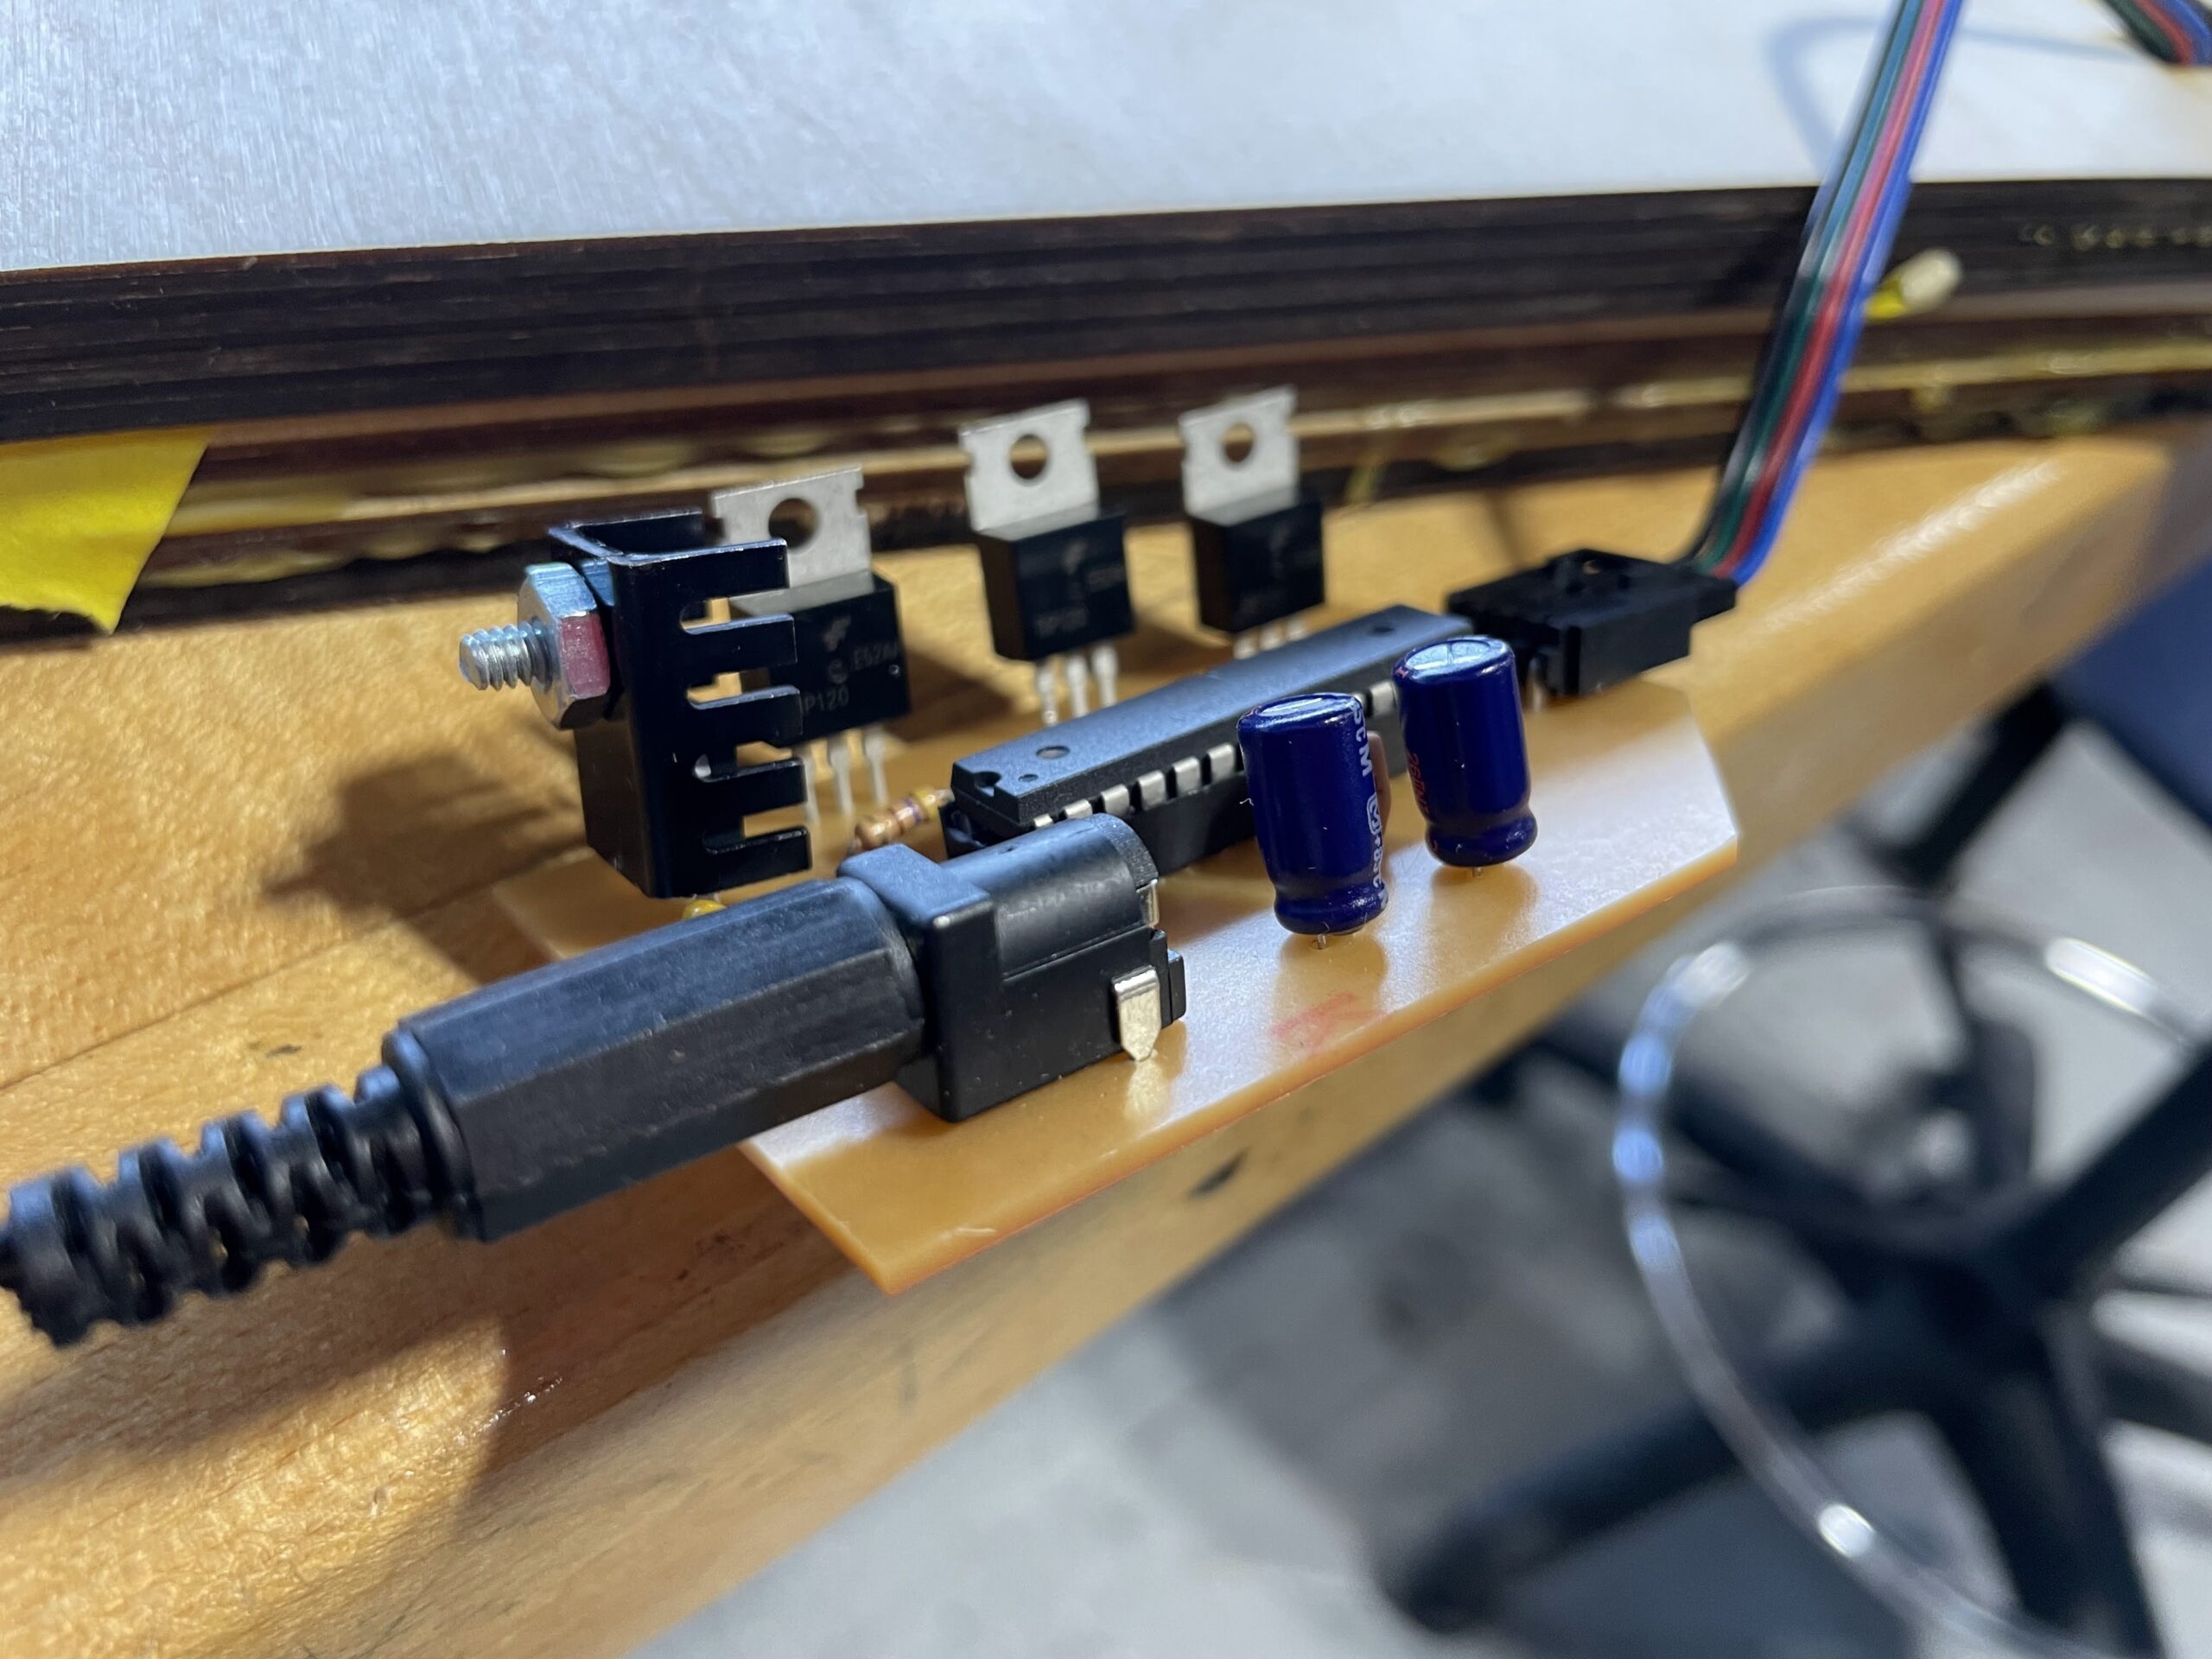
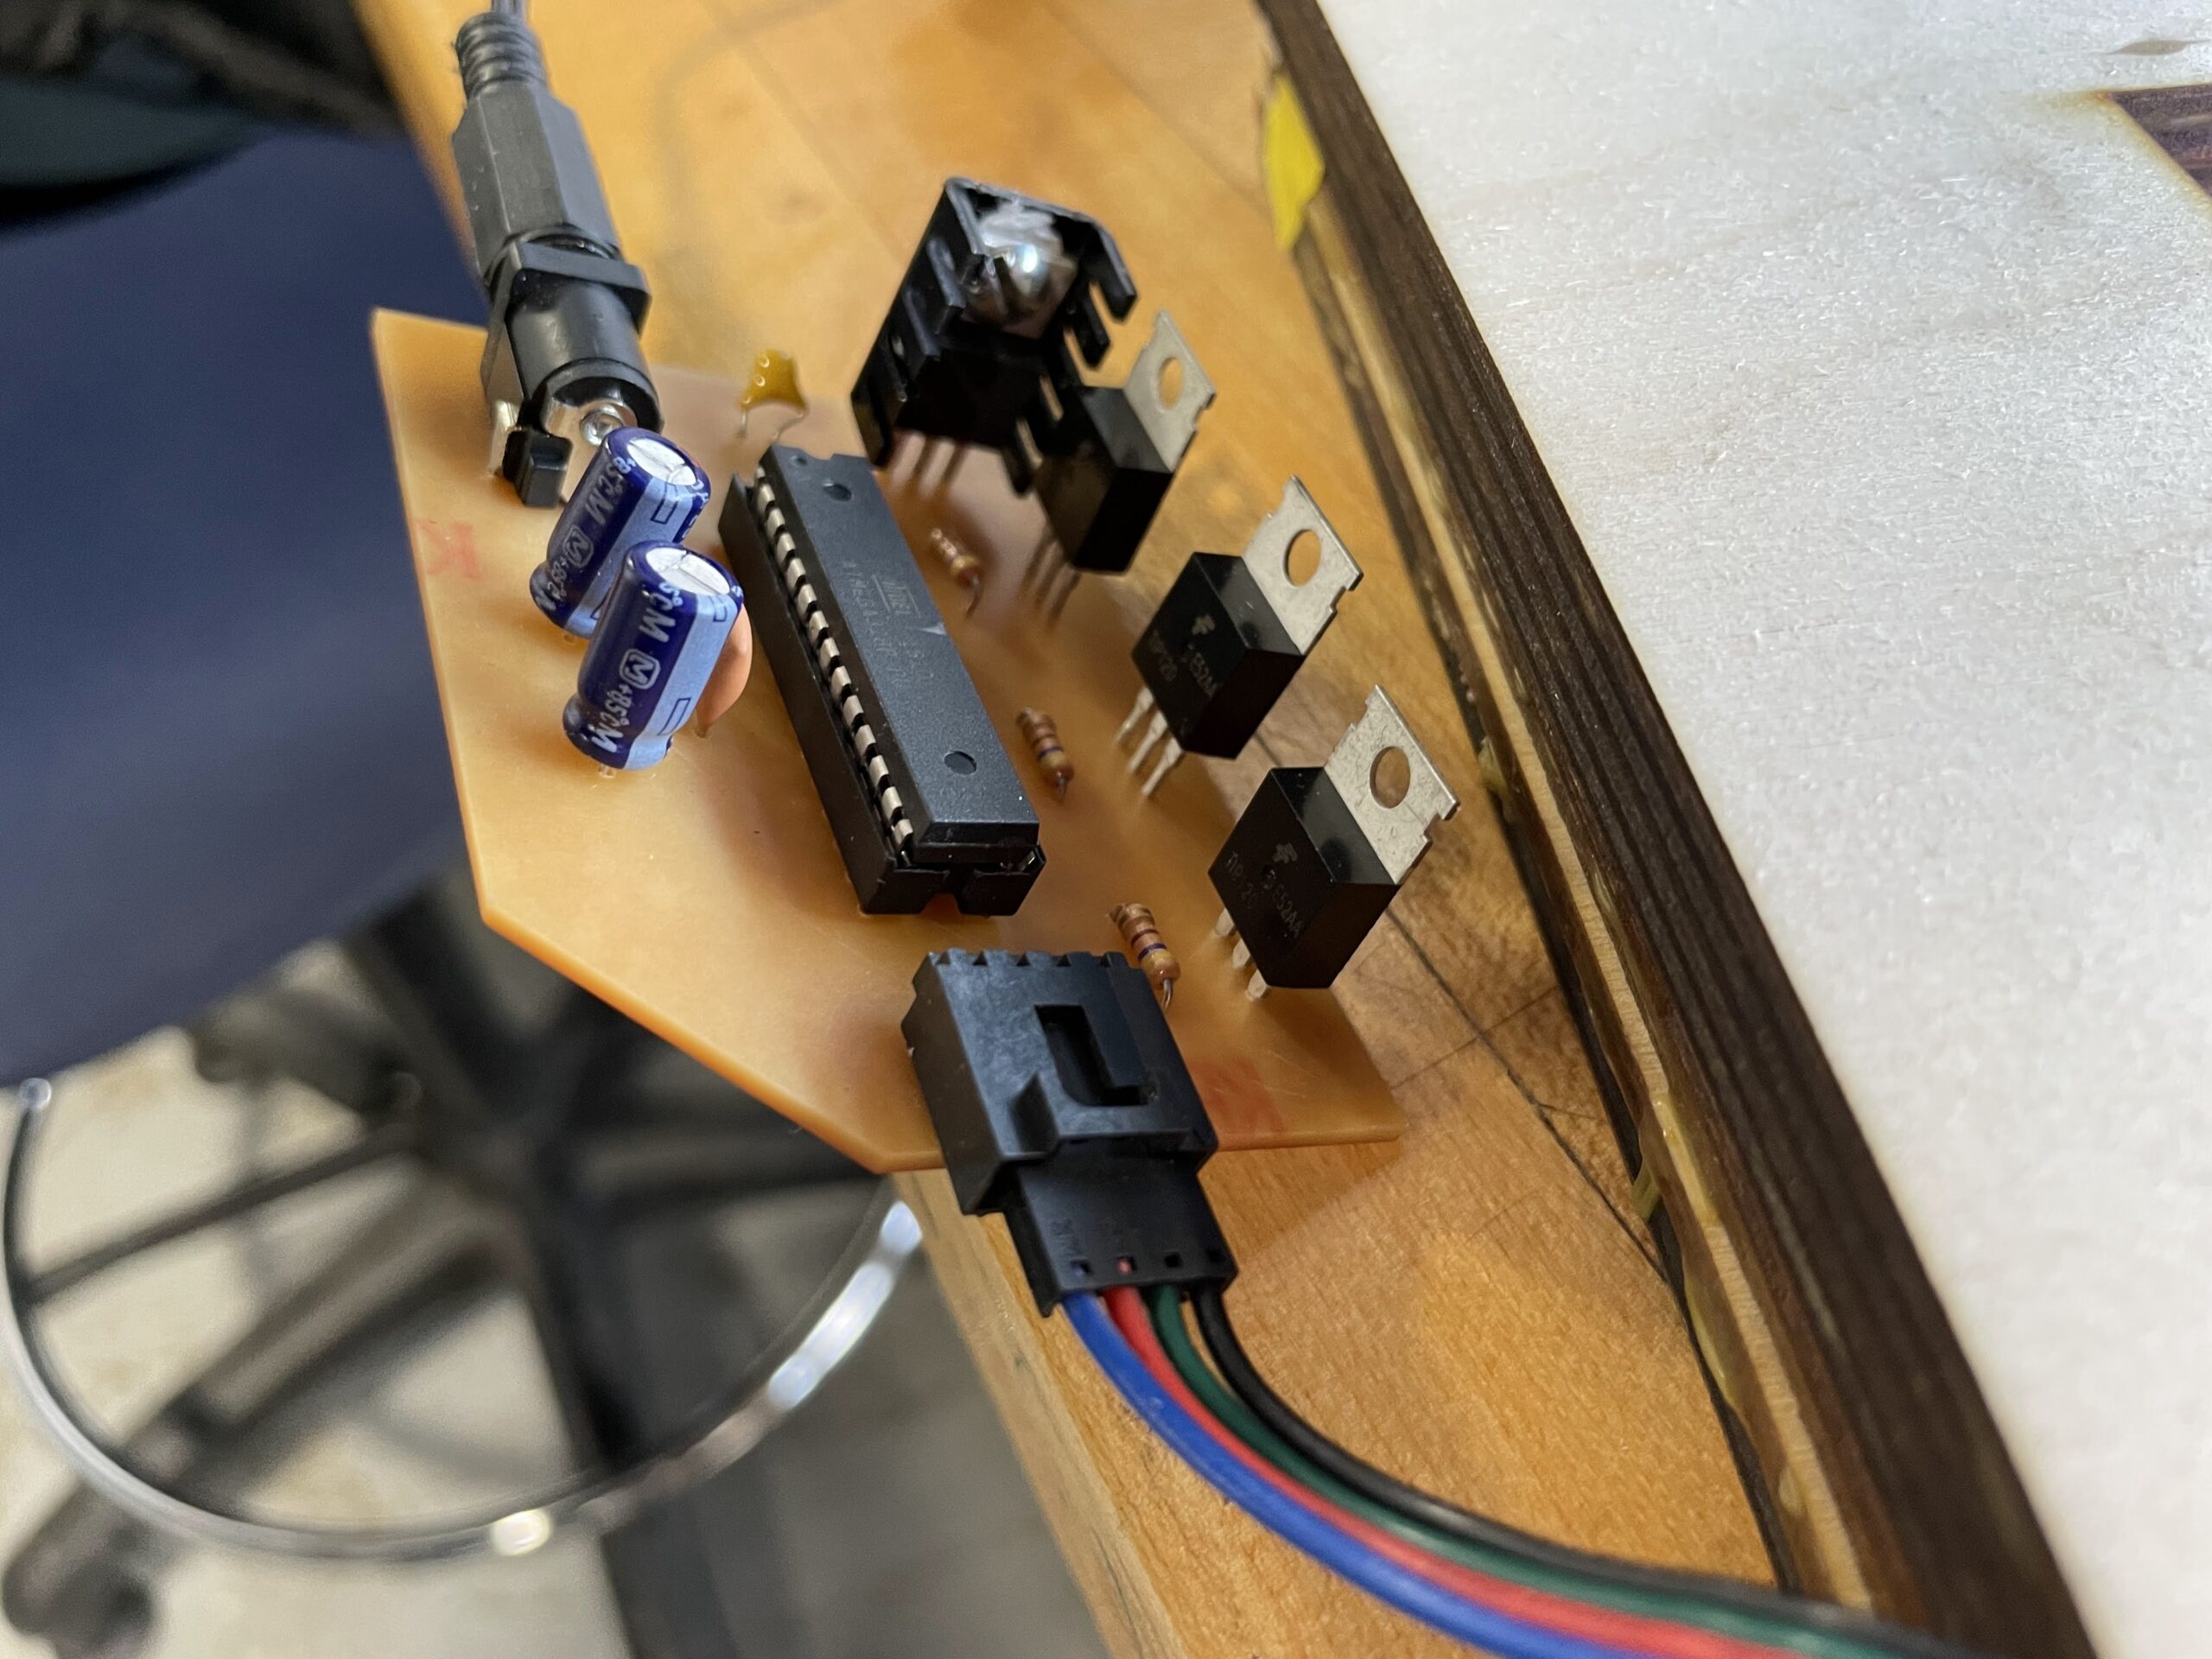
There is still some finishing work to be done on this particular LED Light Box, but it’s a nice example of projects coming out of our shop. Our current sophomore are beginning their lightboxes right now, which generally begins with finalizing their circuitry on breadboards and then milling their PCB boards on our Bantam Tools mills. Enjoy the photos and video of the project below.

LED Word Clock Complete

It’s taken quite a while, but the LED Word Clock looks to be finished. This was a project started a few years ago by some students, and then was completely redone by a current Junior from our shop. This student has spent most of the semester putting the project together in a manner that looks professional, like a product off the shelf.

The design uses about 10 layers of lasercut wood to conceal the wiring and house the lettering and spacing pieces. The circuit board is custom made on our Bantam Tools PCB mill, and all the wood and acrylic were cut on our Epilog Fusion Pro. Just a few photos below of the finished product, hoping to have a more detailed writeup of the process from the student.

Tormach Resolved

I believe it was Tuesday when I reported having some issue with my Tormach. You can read about the initial symptoms here. Fortunately, Tormach has very good support, at least in my opinion. I had also let Tormach know the automatic draw bar was not functioning, the lock and release buttons were not doing anything despite having good air pressure, and other air pressure related functions working properly. This led them to believe that the draw bar control board may not be receiving power, which would then affect the ATC, as both are used together during tool changes.

I put a multimeter on the draw bar control board and was not reading any voltage. I traced the wires back to their source at the electrical cabinet and also received not voltage at that point, which suggested perhaps a fuse had blown. However, while looking at the fuse board in the electrical cabinet I did notice a few small chips of aluminum on the board, which might be shorting out the board and causing the issue. I brushed those chips away and retested the wires numbered 501 and 502. 11.92 V showing on the multimeter, problem solved.

Looks like some chips somehow made it into the electrical cabinet and shorted out the fuse board, specifically the 501 and 502 wires to the draw bar control board. It took a day or so to track down the issue, but luckily it was an easy and cheap fix. Some photos below.

Tormach Issues

Today I was going to perform some test taps on the Tormach mill to make sure I had my speeds and feeds correct. Unfortunately, when I turned on the machine this morning, the computer screen said No Signal and I could hear rapid beeping coming from the computer underneath the mill. I contacted Tormach and they suggested reseating the memory card in the computer. Seemed strange, but they had a pdf guide on how to do it, which suggested its not an uncommon problem. These machines do vibrate a lot, it is certainly a possibility. After reseating the memory card the computer started up without issue. Problem solved.

Unfortunately, when trying to use the ATC (Automatic Tool Changer), I received a communication error between the ATC and Draw Bar. They error message said to check the ATC to Drawbar cabling and fuses – but I am not really sure where to start for that. I’ve contacted Tormach again and awaiting their response. They have always been good about getting back to me for support issues, so hopefully we can resolve this quickly. I’ll post some photos of the errors I was receiving.

Pi Radio Continued

Today I began setting up the Raspberry Pi for the internet radio project. I do not know too much about coding, and the instructions from the Instructables website did not always make sense to me. Additionally, the tutorial is from 2017, so some of the information is outdated. For one, the settings options on the pi are slightly different than in the tutorial, but I was able to figure out how to get what I needed.

Additionally, the tutorial asks to upload a specific media player to the pi, yet the when I attempted to do that via SSH, it said it could not find the media player. I was able to upload a different media player, but not sure if it will work. I was also able to upload the python file, which downloaded as html, and I needed to download a python editor in order to save the file. Perhaps there is another way to do this, I just could not figure it out.

I believe that is all that I need on the software side, now I will be adding all the hardware and test it out. Once the hardware is working I will go into the software again and change the radio stations to one I want. Here you can see me using Terminal to talk to my Raspberry Pi.